Introduction
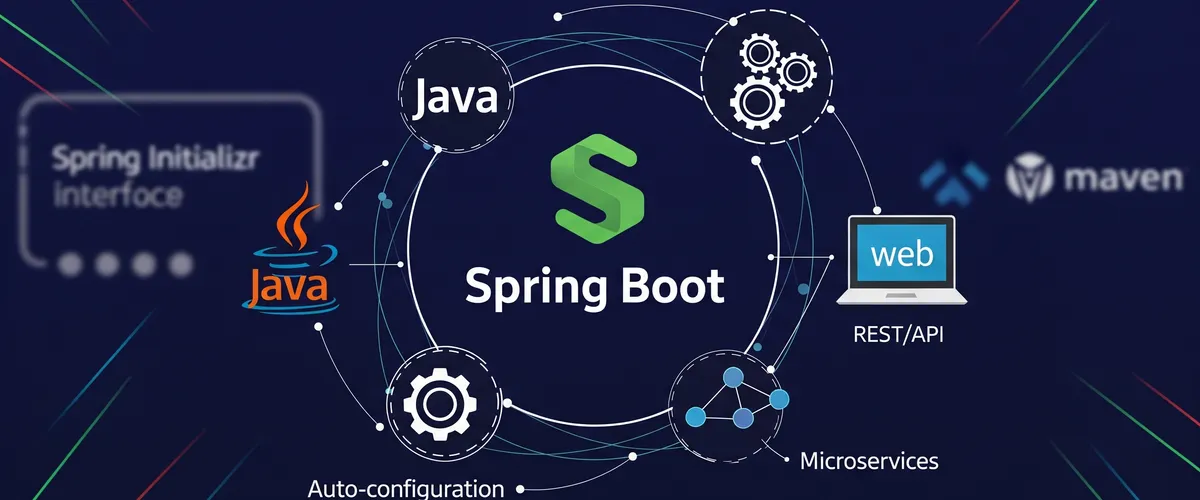
Many developers use the Spring Boot framework to build web apps and microservices. It’s built on top of the Spring Framework and adds a number of conveniences that make it a popular choice for developers. This post covers what Spring Boot is, why it’s useful, and how to create a basic Spring Boot application.
What is Spring Boot?
Spring Boot lets you build standalone, production-ready apps quickly. It ships capabilities you can add to an application in a few lines, including security, data access, and web services. It also configures itself from the dependencies present in the project, so there is no manual configuration to do.
Why Spring Boot?
Spring Boot is a common choice for web apps and microservices because it is easy to use and covers a lot of ground. Developers like the range of capabilities and the fact that it configures itself. Its support for testing and deployment also makes it a strong and trustworthy framework for creating web applications.
Spring Boot features
Easy setup and automatic configuration
One of Spring Boot’s main advantages is that it configures itself from the dependencies present in the project. Developers no longer have to set the program up by hand, which cuts down on the time and effort needed to get an application up and running.
Stand-alone applications
Another significant benefit is how easy it is to create and run standalone apps. The Spring Boot CLI is what makes this possible: you can construct a new application by executing a single command.
Web development
For creating web applications, Spring Boot supports RESTful web services, web sockets, and data validation, among other things. It also interfaces with a variety of well-known web development tools, like Mustache, FreeMarker, and Thymeleaf, which makes it simple to build dynamic, interactive web pages.
Testing and deployment
Spring Boot also offers features for testing and deploying apps. The framework supports unit testing tools like JUnit and Mockito. Once an application has been launched, Spring Boot gives you tools for administering and monitoring it, including metrics and health checks.
Build a simple Spring Boot application
Create a Spring Boot project
The first step to building a Spring Boot application is to create a new project. This can be done using the Spring Initializer website (https://start.spring.io) or the Spring Boot CLI.
curl https://start.spring.io/starter.tgz \ -d baseDir=spring-boot-web \ -d version=0.0.1-SNAPSHOT \ -d type=maven-project \ -d language=java \ -d bootVersion=2.4.2 \ -d groupId=io.github.mkabumattar \ -d artifactId=spring-boot-web \ -d name=spring-boot-web \ -d packageName=io.github.mkabumattar.springbootweb \ -d dependencies=web \ -d packaging=jar \ -d javaVersion=11 \ -d dependencies=web \ | tar -xzvf -This command uses curl to download a starter.tgz file from the Spring Initializer website, with the specified options passed in as query parameters. The options include:
baseDir, which sets the base directory for the projectversion, which sets the version of the projecttype, which specifies that the project is a Maven projectlanguage, which sets the programming language of the project as JavabootVersion, which sets the version of Spring Boot to use in the projectgroupId, which sets the Maven groupId for the projectartifactId, which sets the Maven artifactId for the projectname, which sets the name of the projectpackageName, which sets the package name for the projectdependencies, which sets the dependencies needed for the project. In this case, it is webpackaging, which sets the packaging format as a JAR filejavaVersion, which sets the Java version to be used in the project
The output of this command is then piped to the tar command, which extracts the downloaded file. The options passed to tar are xzvf -, which mean extract the archive, gzip compressed, verbosely, reading from stdin.
This command will download and extract a new Spring Boot project with the specified options. The project will have a directory structure that is typical of a Maven project, and it will have the Spring Web dependency already set up and configured.
Create a controller
The next step is to create a controller to handle requests for the application. A controller is a Java class that manages incoming HTTP requests and provides the proper response. Here is a simple controller that sends back the JSON object “Hello World”:
package io.github.mkabumattar.springbootweb.controllers;
import org.springframework.web.bind.annotation.GetMapping;import org.springframework.web.bind.annotation.RestController;
import java.util.HashMap;import java.util.Map;
@RestControllerpublic class HelloWorldController {
@GetMapping("/hello") public Map<String, String> sayHello() { Map<String, String> response = new HashMap<>(); response.put("message", "Hello World!"); return response; }}The @GetMapping annotation tells Spring that this method should handle GET requests to the /hello endpoint, and the @RestController annotation tells Spring to treat this class as a REST controller. The method returns a simple map with a single key-value pair: the key “message” and the value “Hello World”.
This is a simple example of a Spring Boot controller, but it can be extended to handle more complicated routes, accept various requests, and deliver more sophisticated results.
Run the application
Once the project has been constructed and a controller has been added, you can launch the application from the main method in the generated SpringBootWebApplication.java file, or with the spring-boot:run command if you are using the Spring Boot CLI.
You can also build the program and launch the jar file it produces. Use mvn clean install to build a Spring Boot application with Maven, and then java -jar target/your-jar-file.jar to launch the created jar file.
When the application is up and running, it is reachable at http://localhost:8080 by default. To test it, open http://localhost:8080/hello in the browser, or send a GET request to that endpoint using a program like curl or postman. The answer should be a json object with a single key-value pair: the key “message” and the value “Hello World”.
You can also select a different port number: set the server.port property in the application.properties file, or add --server.port=<your-port-number> to the command line arguments when executing the application.
Spring Boot automatically starts an embedded Tomcat, Jetty, or Undertow server when you launch the application, to process web requests and run your application.
Test the application
After launching the Spring Boot application, you can test it to make sure everything is operating as it should. One method is to make a request to the endpoints specified in your controllers, using a web browser or a tool like curl or postman, and look at what comes back.
In the preceding example we created a HelloWorldController that handles the /hello endpoint. So you can test it by visiting the URL http://localhost:8080/hello in a web browser, or by sending a GET request to that endpoint using a tool like curl or postman. The response should be a json object with a single key-value pair: the key “message” and the value “Hello World”.
Unit tests, written with a testing framework like JUnit or TestNG, are another approach. Those tests can cover the controllers, services, and repository classes, among other components of the application. Spring Boot offers a variety of annotations and services that make writing tests for a Spring Boot application simple.
JUnit is a well-liked testing framework for Java applications, and one option for testing a Spring Boot application. With JUnit you can write unit tests for specific application parts, such as the controllers, services, and repository classes.
To use JUnit in a Spring Boot application that uses Maven as a build tool, you must include the JUnit dependency in the pom.xml file.
Here is an example of how you can add JUnit to your pom.xml file:
<dependency> <groupId>junit</groupId> <artifactId>junit</artifactId> <version>4.13.2</version> <scope>test</scope></dependency>Here is an example of how you can use JUnit to test a simple REST controller:
package io.github.mkabumattar.springbootweb.controllers;
import static org.hamcrest.Matchers.is;import static org.springframework.test.web.servlet.request.MockMvcRequestBuilders.get;import static org.springframework.test.web.servlet.result.MockMvcResultMatchers.jsonPath;import static org.springframework.test.web.servlet.result.MockMvcResultMatchers.status;
import org.junit.Before;import org.junit.Test;import org.junit.runner.RunWith;import org.springframework.boot.test.autoconfigure.web.servlet.AutoConfigureMockMvc;import org.springframework.boot.test.context.SpringBootTest;import org.springframework.test.context.junit4.SpringRunner;import org.springframework.test.web.servlet.MockMvc;import org.springframework.test.web.servlet.setup.MockMvcBuilders;
@RunWith(SpringRunner.class)@SpringBootTest@AutoConfigureMockMvcpublic class HelloWorldControllerTest { private MockMvc mockMvc;
@Before public void setUp() { mockMvc = MockMvcBuilders.standaloneSetup(new HelloWorldController()).build(); }
@Test public void testSayHello() throws Exception { mockMvc.perform(get("/hello")) .andExpect(status().isOk()) .andExpect(jsonPath("$.message", is("Hello World!"))); }}Conclusion
Spring Boot is an effective framework for creating Java web apps. Automatic setup, stand-alone applications, web development, testing, and deployment are just a few of the capabilities it offers, and together they make a Spring-based application simple to set up, configure, and execute.
We have covered the fundamentals of Spring Boot in this post, along with how to construct a simple Spring Boot application. We went through creating a project, adding a Spring Web dependency, adding a controller, running the application, and testing it. We also looked at how to test the application using MockMvc and JUnit.
Spring Boot is a solid option for building web apps: it’s simple to get started with and includes a lot of functionality out of the box. Its documentation and community make it easier to find tools and help while building and shipping your application.
This only covers the basics of what Spring Boot can do. As you use it more, you’ll get familiar with more of its capabilities and learn how to use them to build more complex applications.
References
Here are some references that you can use to learn more about Spring Boot:
- Spring Boot Official Website
- Spring Boot Reference Guide (Current Version)
- Spring Initializr - Tool for bootstrapping Spring Boot projects.
- Spring Framework Documentation
- Building a RESTful Web Service with Spring Boot - Official Spring Guide.
- Spring Boot GitHub Repository
- Baeldung - Spring Boot Tutorials (Popular community resource)
- Maven Official Website
- JUnit 5 User Guide
- Spring Boot Testing - Official documentation on testing.
- What is Spring Boot? - spring.io
- Spring Boot CLI Documentation
- Thymeleaf Documentation (for web development with Spring Boot)
- MockMvc - Spring Framework Documentation