Introduction
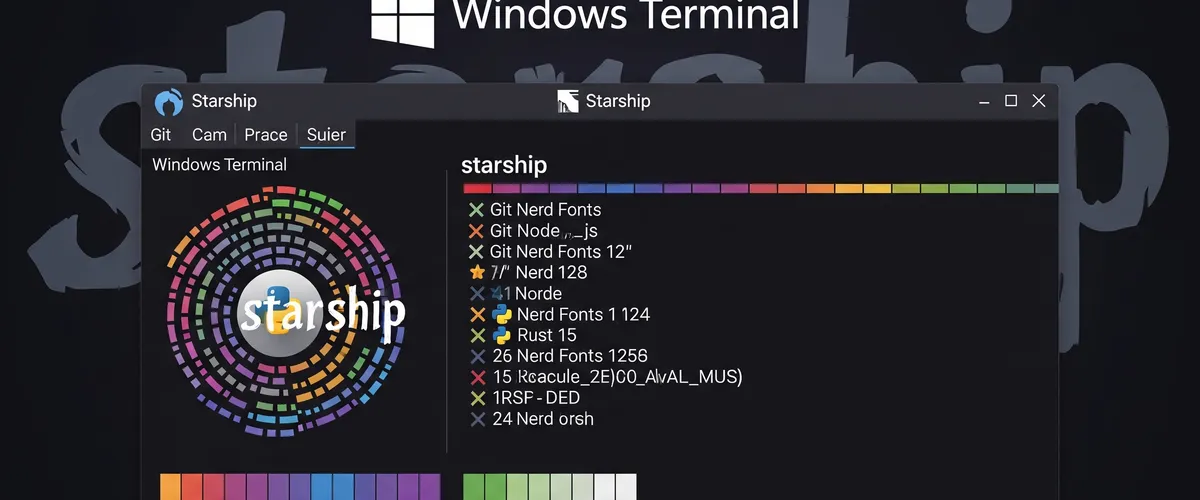
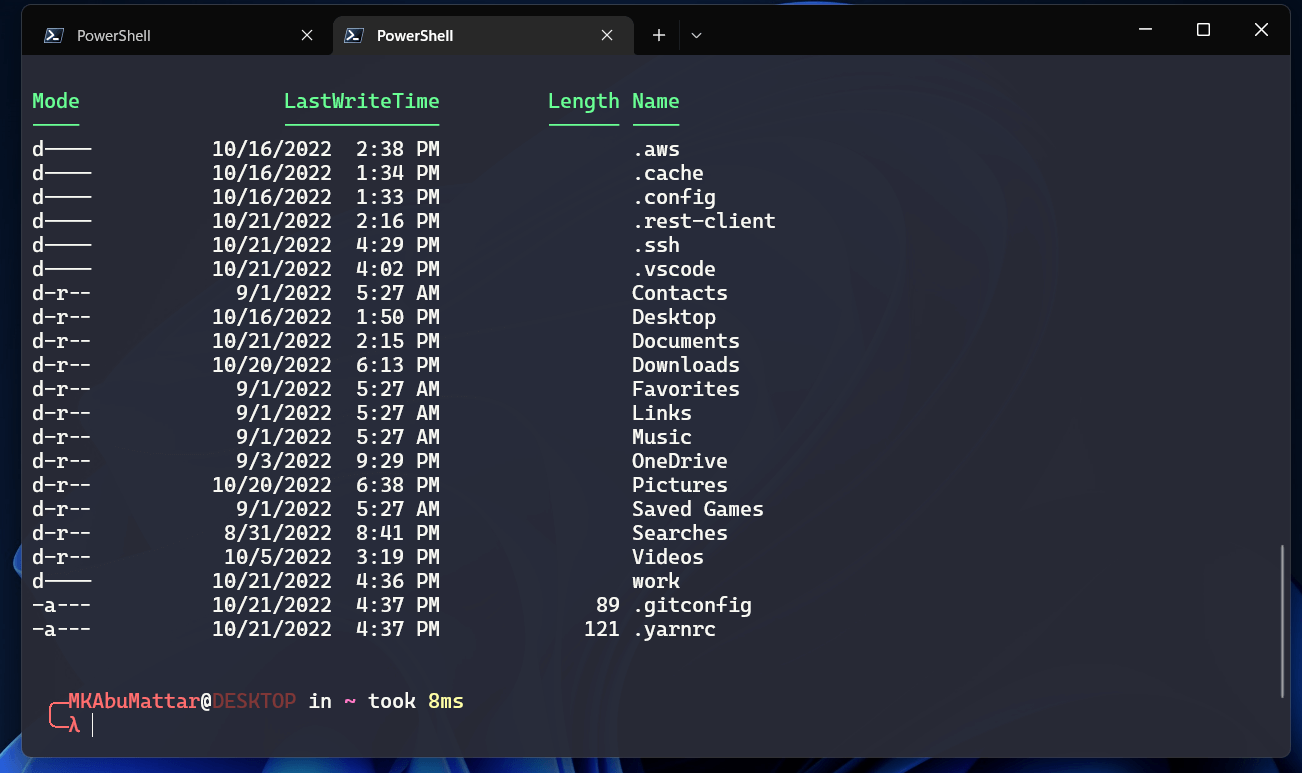
In this article, we will install PowerShell and Starship, configure Windows Terminal, and then customize it with Starship.
What is Windows Terminal?
Windows Terminal is a modern, fast terminal application for users of command-line tools and shells like Command Prompt, PowerShell, and WSL. It has plenty of features that make it useful for developers and system administrators. It is a solid replacement for the default Windows Command Prompt and PowerShell.
What is Starship?
Starship is a cross-shell prompt for any shell. It shows information about the current directory, the active branch, the status of the repository, and much more. It is highly customizable and can be extended with custom modules. It is written in Rust and is blazingly fast.
Installation
Install Windows Terminal
To install Windows Terminal, you can download it from the Microsoft Store or from the GitHub repository, or you can use the Chocolatey package manager or Winget package manager.
Install Windows Terminal from the Microsoft Store
To install Windows Terminal from the Microsoft Store, you can follow the steps below:
- Open the Microsoft Store.
- Search for Windows Terminal.
- Click on the Get button.
Install Windows Terminal from GitHub
To install Windows Terminal from GitHub, you can follow the steps below:
- Open the GitHub repository.
- Click on the Releases tab.
- Click on the latest release.
- Click on the WindowsTerminal.exe file.
- Click on the Download button.
Install Windows Terminal with Chocolatey
To install Windows Terminal with Chocolatey, you can follow the steps below:
- Open the Chocolatey website.
- Click on Packages.
- Search for Windows Terminal.
- Click on the command to install Windows Terminal.
- Run the command in CMD.
choco install microsoft-windows-terminal --pre -yInstall Windows Terminal with Winget
To install Windows Terminal with Winget, you can follow the steps below:
- Open the Winget website.
- Search for Windows Terminal.
- Click on the command to install Windows Terminal.
- Run the command in CMD.
winget install --id=Microsoft.WindowsTerminal -eInstall PowerShell
To install PowerShell, you can download it from the Microsoft Store or from the GitHub repository, or you can use the Chocolatey package manager or Winget package manager.
Install PowerShell from the Microsoft Store
To install PowerShell from the Microsoft Store, you can follow the steps below:
- Open the Microsoft Store.
- Search for PowerShell.
- Click on the Get button.
Install PowerShell from GitHub
To install PowerShell from GitHub, you can follow the steps below:
- Open the GitHub repository.
- Click on the Releases tab.
- Click on the latest release.
- Click on the PowerShell-7.2.0-win-x64.msi file.
- Click on the Download button.
Install PowerShell with Chocolatey
To install PowerShell with Chocolatey, you can follow the steps below:
- Open the Chocolatey website.
- Click on Packages.
- Search for PowerShell.
- Click on the command to install PowerShell.
- Run the command in CMD.
choco install powershell -yInstall PowerShell with Winget
To install PowerShell with Winget, you can follow the steps below:
- Open the Winget website.
- Search for PowerShell.
- Click on the command to install PowerShell.
- Run the command in CMD.
winget install --id=Microsoft.PowerShell -eInstall Starship
To install Starship, you can download it from the GitHub repository, or you can use the Chocolatey package manager or Winget package manager.
Install Starship from GitHub
To install Starship from GitHub, you can follow the steps below:
- Open the GitHub repository.
- Click on the Releases tab.
- Click on the latest release.
- Click on the starship-x86_64-pc-windows-msvc.zip file.
- Click on the Download button.
Install Starship with Chocolatey
To install Starship with Chocolatey, you can follow the steps below:
- Open the Chocolatey website.
- Click on Packages.
- Search for Starship.
- Click on the command to install Starship.
- Run the command in CMD.
choco install starship -yInstall Starship with Winget
To install Starship with Winget, you can follow the steps below:
- Open the Winget website.
- Search for Starship.
- Click on the command to install Starship.
- Run the command in CMD.
winget install --id=Starship.Starship -eInstall a Nerd Font
Install a Nerd Font quickly from the Nerd Fonts website. You can choose any font you like. I will use the Caskaydia Cove Nerd Font font.
Configuration
Configure Starship
To configure Starship, you can follow the steps below:
- Open PowerShell.
- Run the command below to create the configuration file.
mkdir -p ~/.config && touch ~/.config/starship.toml- Open the configuration file with your favorite text editor.
notepad ~/.config/starship.toml- Copy the configuration below and paste it in the configuration file. GitHub | starship.toml
## .# .. .''# .,'..,. ..,;,'# ,;;;;,, .,,;;;# ,;;;;;' .',;;;# ,;;;;,'...,;;;,# ,;;;;;,,;;;;.# ,;;;;;;;;;# .,;;;;;;;# .,;;;;;;;'# .,;;;;;;;,'# .',;;;;;;;;;;,.# ..,;;;;;;;;;;;;;,.# .';;;;;. ';;;;;;,'# .,;;;;. ,; .;; .,# ',;;;. .# .,;;.# ,;### FIRST LINE/ROW: Info & Status# First param ─┌[username]format = " [╭─$user]($style)@"show_always = truestyle_root = "bold red"style_user = "bold red"
# Second param[hostname]disabled = falseformat = "[$hostname]($style) in "ssh_only = falsestyle = "bold dimmed red"trim_at = "-"
# Third param[directory]style = "purple"truncate_to_repo = truetruncation_length = 0truncation_symbol = "repo: "
# Fourth param[sudo]disabled = false
# Before all the version info (python, nodejs, php, etc.)[git_status]ahead = "⇡${count}"behind = "⇣${count}"deleted = "x"diverged = "⇕⇡${ahead_count}⇣${behind_count}"style = "white"
# Last param in the first line/row[cmd_duration]disabled = falseformat = "took [$duration]($style)"min_time = 1
## SECOND LINE/ROW: Prompt# Somethere at the beginning[battery]charging_symbol = ""disabled = truedischarging_symbol = ""full_symbol = ""
[[battery.display]] # "bold red" style when capacity is between 0% and 10%disabled = falsestyle = "bold red"threshold = 15
[[battery.display]] # "bold yellow" style when capacity is between 10% and 30%disabled = truestyle = "bold yellow"threshold = 50
[[battery.display]] # "bold green" style when capacity is between 10% and 30%disabled = truestyle = "bold green"threshold = 80
# Prompt: optional param 1[time]disabled = trueformat = " 🕙 $time($style)\n"style = "bright-white"time_format = "%T"
# Prompt: param 2[character]error_symbol = " [×](bold red)"success_symbol = " [╰─λ](bold red)"
# SYMBOLS[status]disabled = falseformat = '[\[$symbol$status_common_meaning$status_signal_name$status_maybe_int\]]($style)'map_symbol = truepipestatus = truesymbol = "🔴"
[aws]symbol = " "
[conda]symbol = " "
[dart]symbol = " "
[docker_context]symbol = " "
[elixir]symbol = " "
[elm]symbol = " "
[git_branch]symbol = " "
[golang]symbol = " "
[hg_branch]symbol = " "
[java]symbol = " "
[julia]symbol = " "
[nim]symbol = " "
[nix_shell]symbol = " "
[nodejs]symbol = " "
[package]symbol = " "
[perl]symbol = " "
[php]symbol = " "
[python]symbol = " "
[ruby]symbol = " "
[rust]symbol = " "
[swift]symbol = "ﯣ "Configure Starship on PowerShell
Every time a PowerShell instance launches, we need to initialize Starship. To do that, we’ll add the following line to our PowerShell profile.
To create a PowerShell profile and add the Starship line, you can follow the steps below:
- Open Windows Terminal.
- Run the following command to create a PowerShell profile.
New-Item -Path $PROFILE -ItemType File -Force- Use the
Set-Contentcmdlet to add the line to the profile.
$CONFIG_PROFILE = {function Invoke-Starship-TransientFunction { &starship module character}
Invoke-Expression (&starship init powershell)}
Set-Content -Path $PROFILE -Value $CONFIG_PROFILENote
You can check the location of this file by querying the $PROFILE variable in
PowerShell. The path is often
~\Documents\PowerShell\Microsoft.PowerShell_profile.ps1.
Configure PowerShell on Windows Terminal
To configure PowerShell on Windows Terminal, you can follow the steps below:
- Open Windows Terminal.
- Press
Ctrl + ,to open the settings. - Click on
settings.jsonto open the settings file. - Add the following lines to the
profilessection.
{ "guid": "{574e775e-4f2a-5b96-ac1e-a2962a402336}", "hidden": false, "name": "PowerShell", "source": "Windows.Terminal.PowershellCore"}- Change the
hiddenproperty totruefor theWindows PowerShellprofile.
{ "commandline": "%SystemRoot%\\System32\\WindowsPowerShell\\v1.0\\powershell.exe", "guid": "{61c54bbd-c2c6-5271-96e7-009a87ff44bf}", "hidden": true, "name": "Windows PowerShell"}- Add
Dracula schemesto theschemessection.
{ "background": "#282A36", "black": "#21222C", "blue": "#BD93F9", "brightBlack": "#6272A4", "brightBlue": "#D6ACFF", "brightCyan": "#A4FFFF", "brightGreen": "#69FF94", "brightPurple": "#FF92DF", "brightRed": "#FF6E6E", "brightWhite": "#FFFFFF", "brightYellow": "#FFFFA5", "cursorColor": "#F8F8F2", "cyan": "#8BE9FD", "foreground": "#F8F8F2", "green": "#50FA7B", "name": "Dracula", "purple": "#FF79C6", "red": "#FF5555", "selectionBackground": "#44475A", "white": "#F8F8F2", "yellow": "#F1FA8C"}- Save the file and close it.
- Back in Windows Terminal, press
Ctrl + ,to open the settings. - Go to Profiles >> Defaults >> Appearance >> Color scheme, and choose
Dracula. - Go to Profiles >> Defaults >> Appearance >> Font face, and choose
Caskaydia Cove Nerd Font.
Extra configuration
- Open Windows Terminal.
- Run the command below.
# Allow scripts to runSet-ExecutionPolicy -ExecutionPolicy RemoteSigned -Scope CurrentUser
# Install PSReadLineInstall-Module PSReadLine -AllowPrerelease -Force
# Install Terminal-IconsInstall-Module Terminal-Icons -AllowPrerelease -Force- Use the
Set-Contentcmdlet to add the line to the profile.
$CONFIG_PROFILE = {function Invoke-Starship-TransientFunction { &starship module character}
Invoke-Expression (&starship init powershell)
# set PowerShell to UTF-8[console]::InputEncoding = [console]::OutputEncoding = New-Object System.Text.UTF8Encoding
Import-Module -Name Terminal-Icons
Set-PSReadLineOption -PredictionViewStyle ListViewSet-PSReadLineOption -PredictionViewStyle InlineView
Set-PSReadLineOption -EditMode WindowS
Set-PSReadLineKeyHandler -Chord Ctrl+B -ScriptBlock { [Microsoft.PowerShell.PSConsoleReadLine]::RevertLine() [Microsoft.PowerShell.PSConsoleReadLine]::Insert('build') [Microsoft.PowerShell.PSConsoleReadLine]::AcceptLine()}
# This is an example of a macro that you might use to execute a command.# This will add the command to history.Set-PSReadLineKeyHandler -Key Ctrl+Shift+b ` -BriefDescription BuildCurrentDirectory ` -LongDescription "Build the current directory" ` -ScriptBlock { [Microsoft.PowerShell.PSConsoleReadLine]::RevertLine() [Microsoft.PowerShell.PSConsoleReadLine]::Insert("dotnet build") [Microsoft.PowerShell.PSConsoleReadLine]::AcceptLine()}}
Set-Content -Path $PROFILE -Value $CONFIG_PROFILE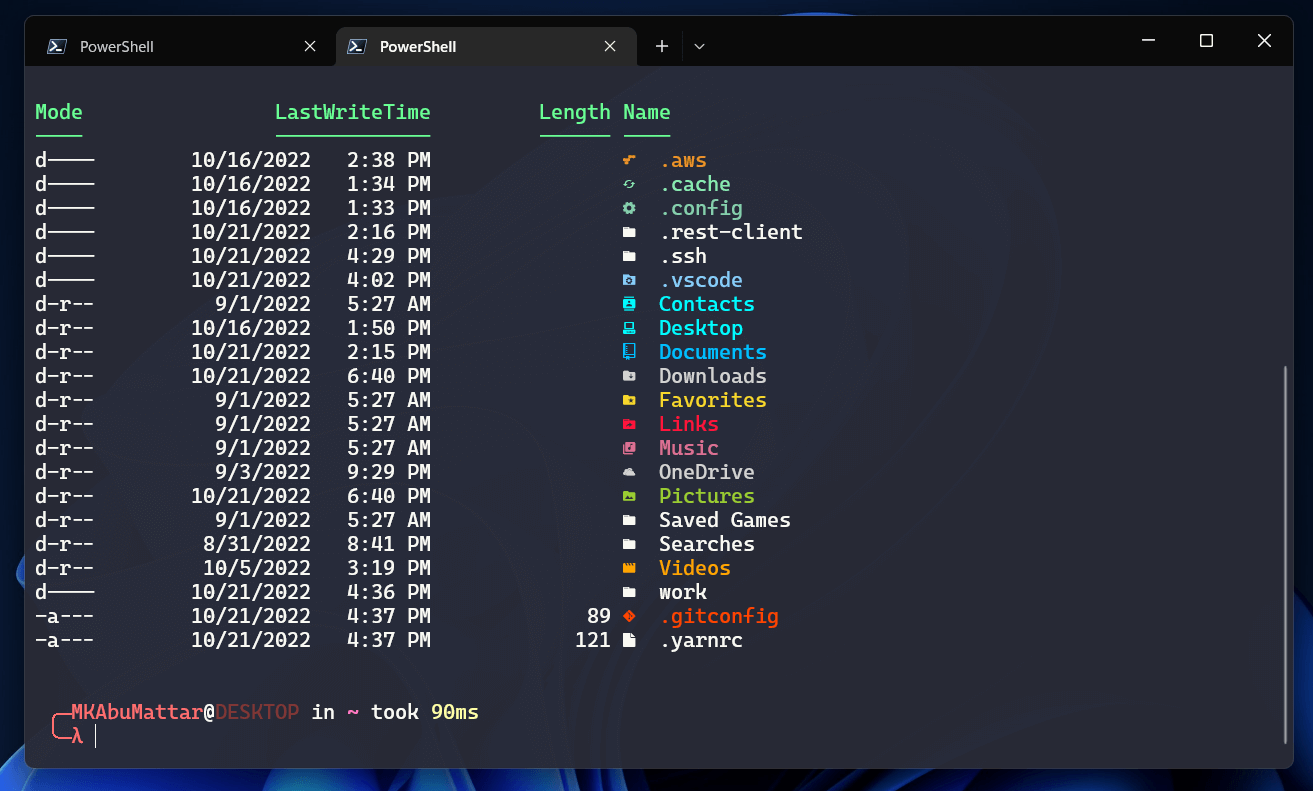
References
- Starship - The minimal, blazing-fast, and infinitely customizable prompt for any shell!
- Starship Configuration Documentation
- Windows Terminal Documentation
- Windows Terminal GitHub Repository
- PowerShell Documentation
- PowerShell GitHub Repository
- Nerd Fonts - Iconic font aggregator, glyphs patcher, and more
- Dracula Theme for Windows Terminal
- Chocolatey - The package manager for Windows
- Winget - Windows Package Manager
- PSReadLine Module - PowerShell Gallery
- Terminal-Icons Module - PowerShell Gallery
- Windows Terminal Settings (JSON) file
- Starship
starship.tomlexample from the post